Add the first item
- Open your draft auction and select Create Your First Auction Item. For later items, select Add Item.
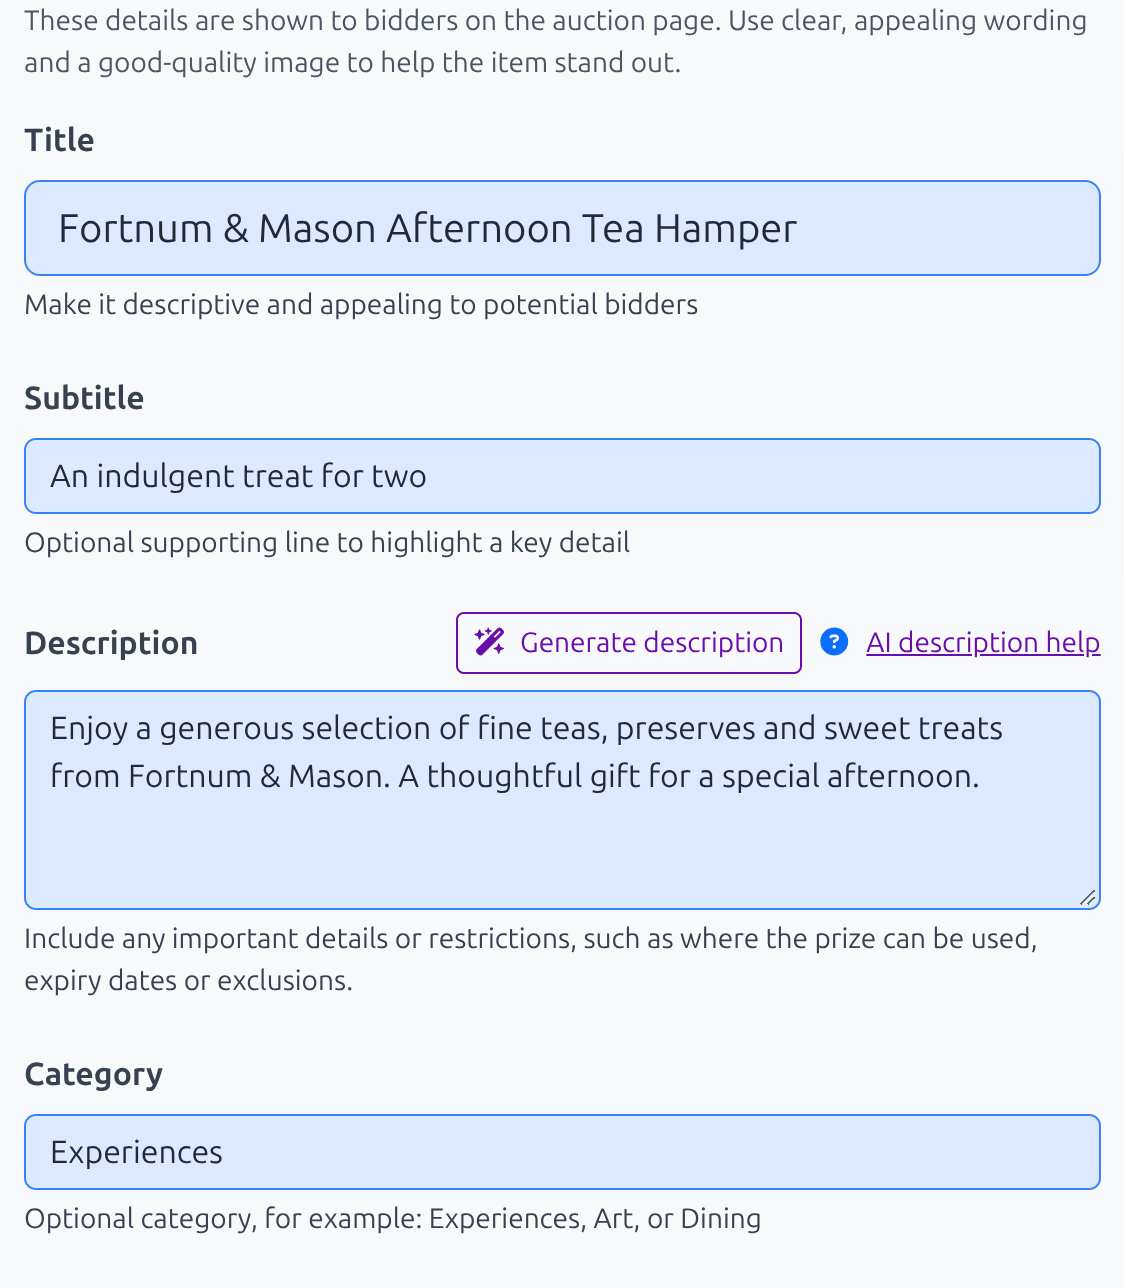
- In Add Auction Item, stay on the Item details tab and add the Title, optional Subtitle, Description and optional Category.
- Check the desktop and mobile previews, then continue through the bidding amounts and images before selecting Add Item.
These details appear on the public item page. Put anything a bidder needs before bidding in the public Description, including expiry dates, exclusions, age or location limits, booking requirements and collection arrangements.
Import several items from a spreadsheet
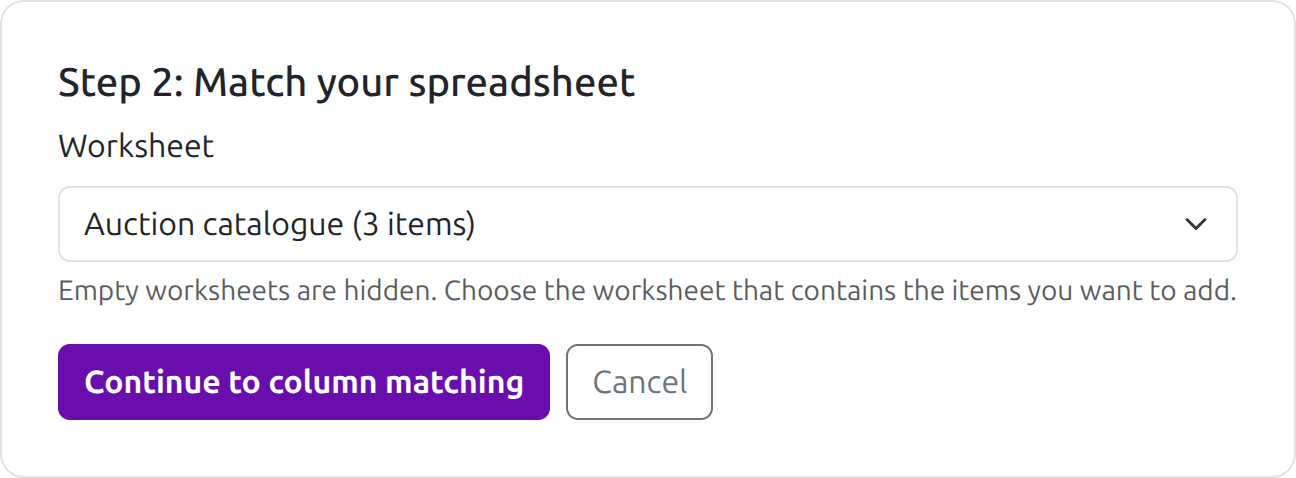
- Open the auction page and select Import items from the menu beside Add item. The spreadsheet workflow opens over the auction page; closing it before confirmation leaves the items unchanged, and a successful import returns you to the refreshed auction view. Choose Add as new items to create every valid row, or Update existing items and add new ones to refresh matching items and add rows with new references. Download the CSV template from the import page if you want a ready-made example.
- Choose a CSV, XLS or XLSX file up to 10 MB. The import accepts up to 1,000 nonblank item rows. A CSV file is also limited to 100,000 records, and each workbook worksheet to 100,000 rows; these safety limits include blank rows. If it has more than one usable worksheet, choose the one to import.
- Review each column's heading and sample values. Match it to an item detail or choose Ignore this column. A heading suggestion is only a starting point; check ambiguous headings and required details such as Item title, Starting amount and Bid increment. Unmapped columns are not imported.
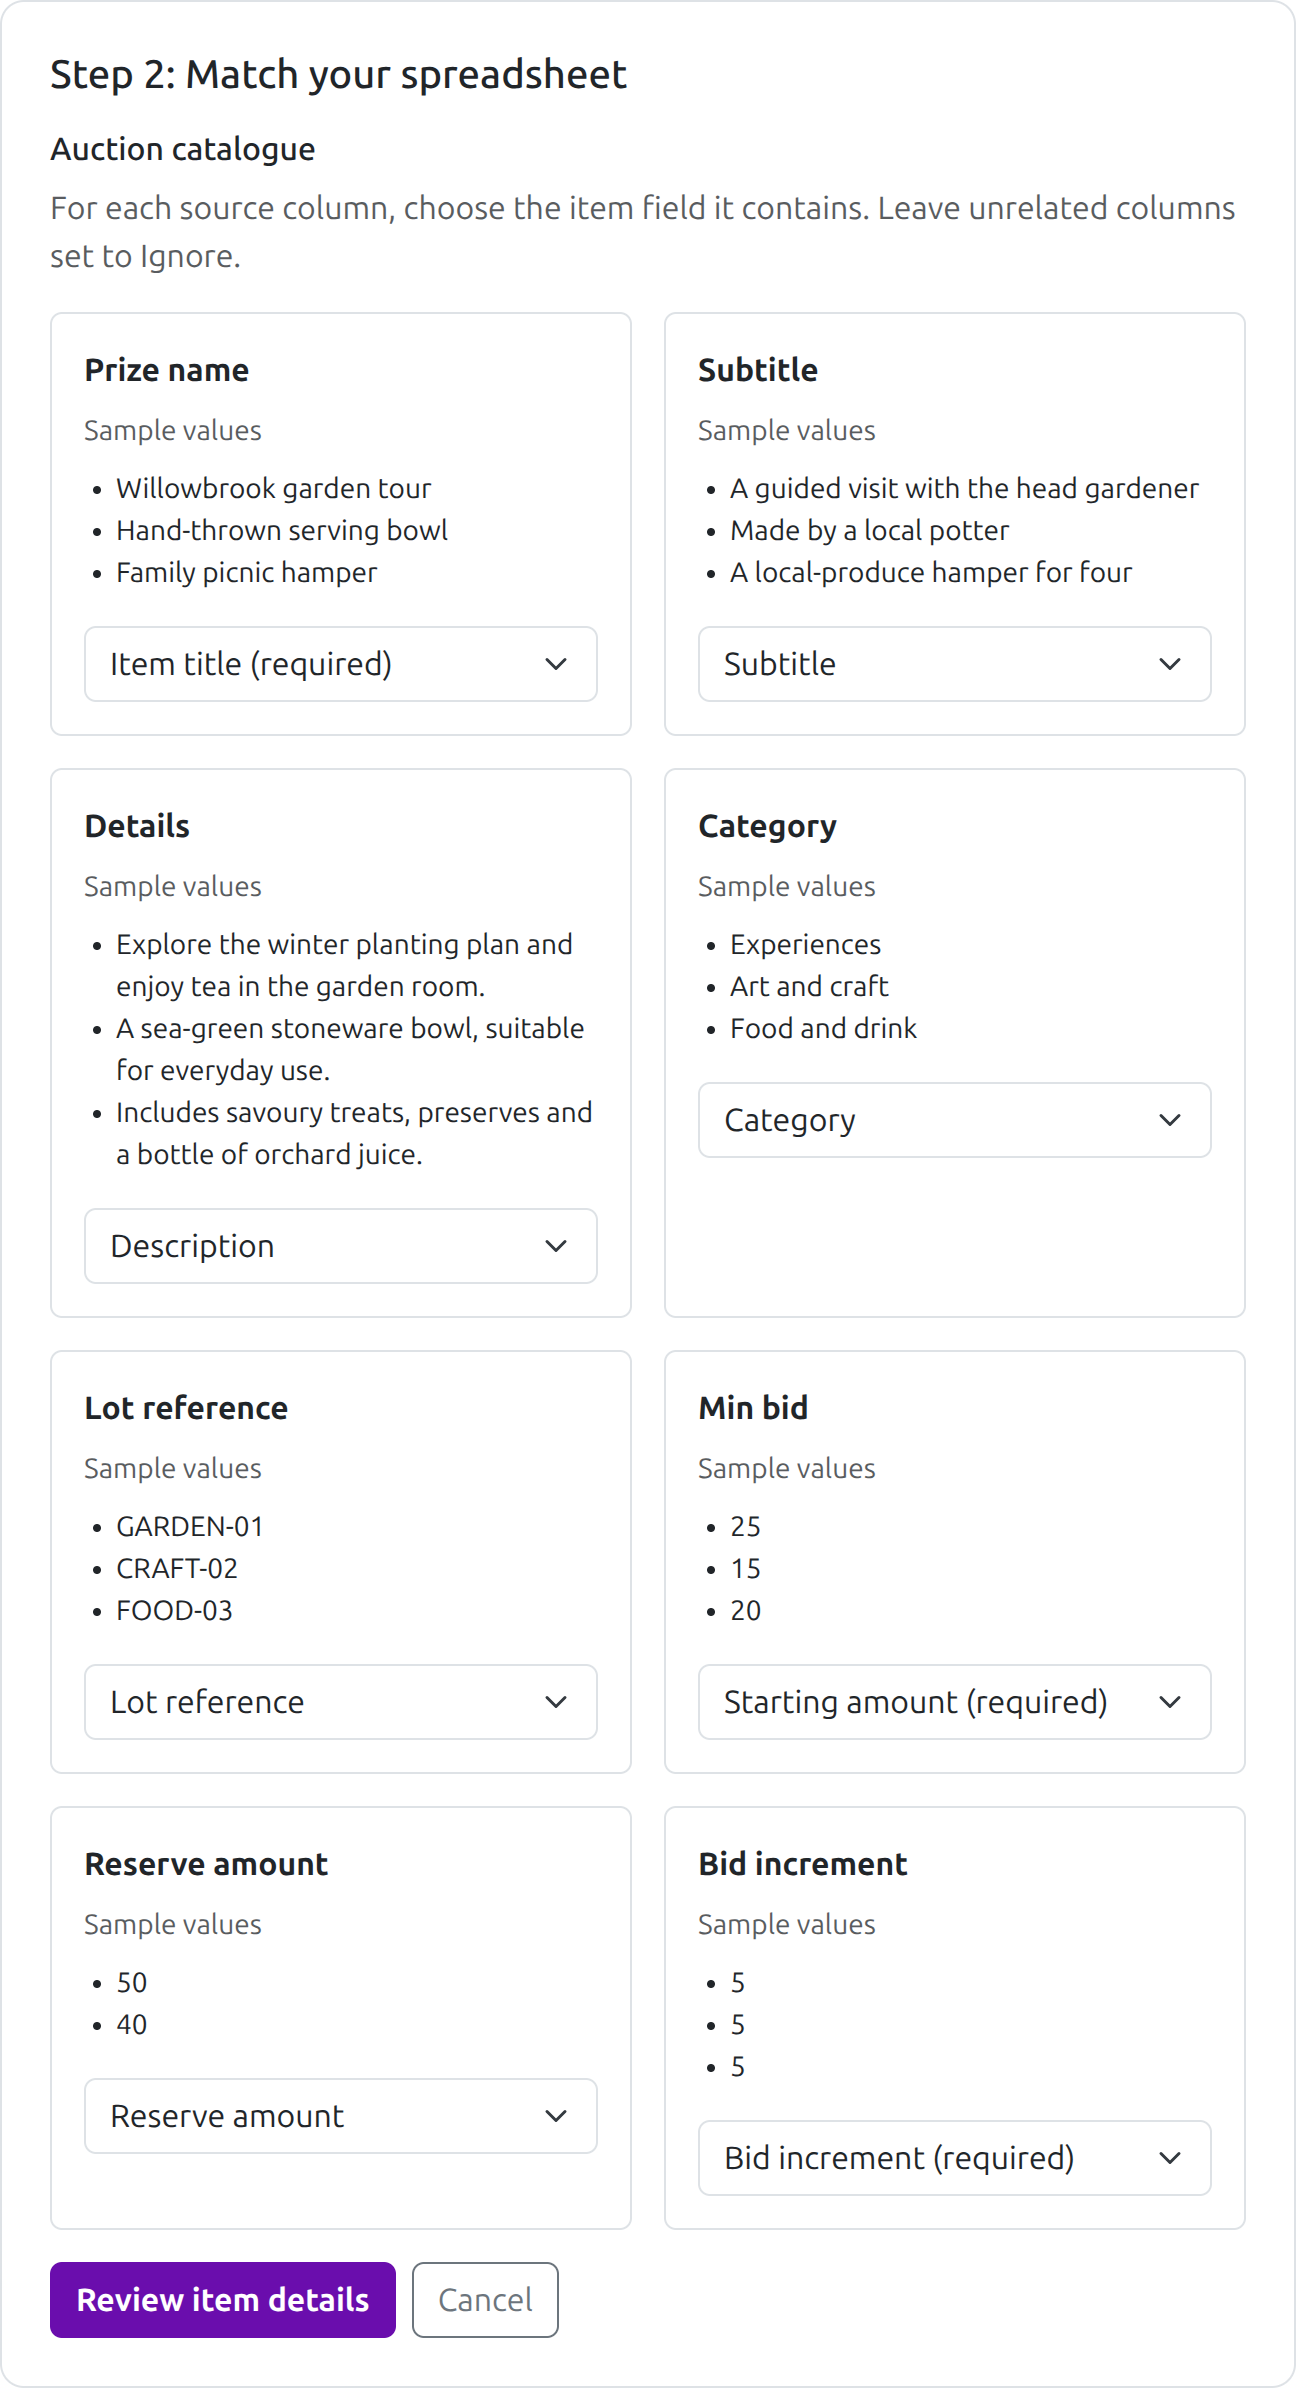
- In Update mode, map a Lot reference column and include a nonblank reference on every row. A unique exact match updates that item; a reference not already in the auction adds an item. The importer does not match by title, description or row order. References are compared after trimming spaces at the beginning and end; case, punctuation, spaces within a reference and leading zeroes remain significant (
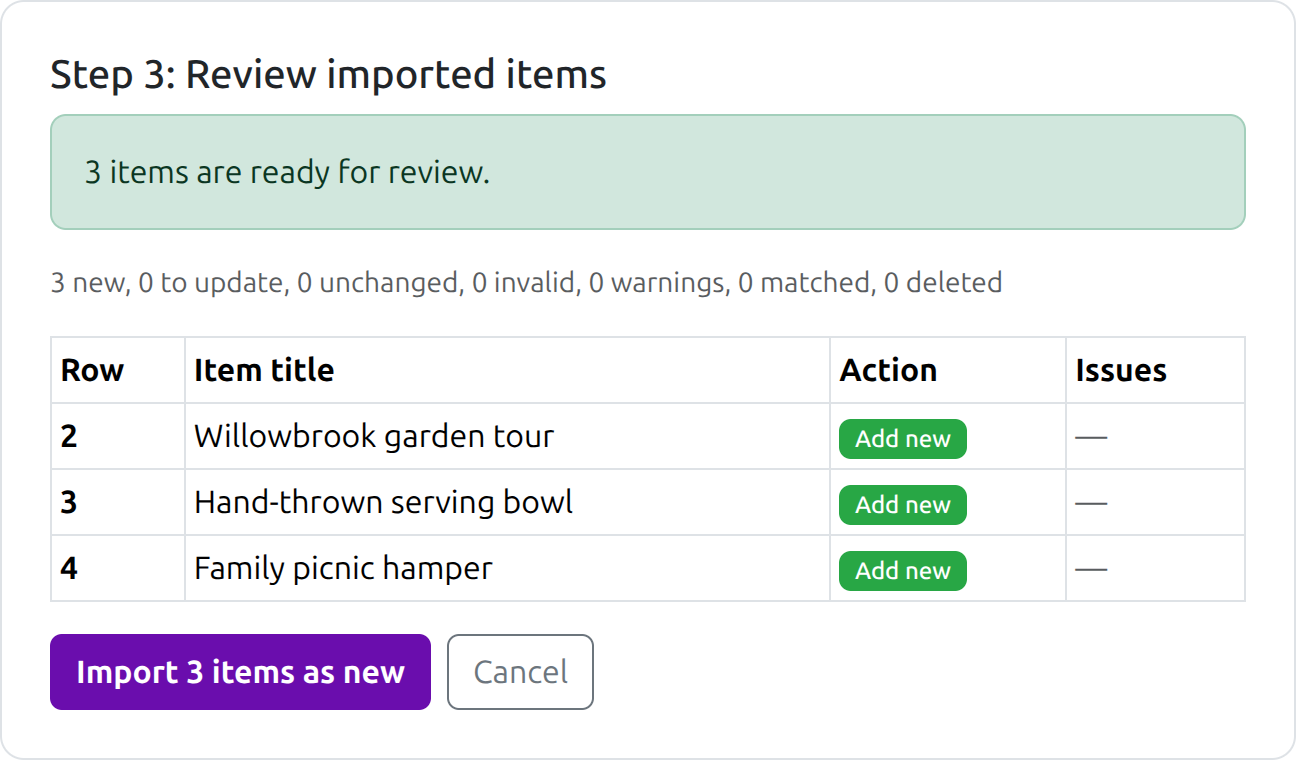
0012and12are different references). Repeated references can be added in Add mode, but they make later updates ambiguous. - Review the row actions and counts for new, updated, unchanged, invalid and warning rows. In Update mode, blank cells and ignored columns preserve existing values; they do not clear them. A mapped Yes/No public donor acknowledgement updates that setting; No also removes the public name and website, while a blank cell preserves the setting. To clear another value, edit the item after importing. Rows missing from the spreadsheet stay in the auction, and imports never delete or archive items. If an item has bids, its starting amount, reserve amount and bid increment cannot be changed by an import.
When there are more than 50 item rows, use Previous and Next to review every page. The counts above the table always cover the whole spreadsheet, not only the rows on the current page. 6. Correct any row-specific problems. No items are changed while you are mapping or reviewing. The whole file must be valid before you can confirm the exact updates and new items shown on the button.
- After the import, choose View items, Add images to the first new item, or Add another import. Imported items can be edited like any other auction item; add their images from Edit Item because images are not included in the spreadsheet.
The auction's currency applies to imported amounts. Enter Starting amount, Reserve amount and Bid increment as whole currency units (for example, 25, not 25.50); a value such as 25.00 is accepted because it has no fractional amount. Leave Reserve amount blank when an item has no reserve. Lot reference is an optional organiser-only identifier that you can edit in the item's Prize admin tab. Keep references unique if you plan to use Update mode; Add mode allows duplicates but shows a warning because those references cannot identify one item unambiguously later.
The review identifies each problem by spreadsheet row and item field. Correct the source workbook and upload it again; no rows are saved until the complete review is valid and you confirm the import.
Set the bidding amounts
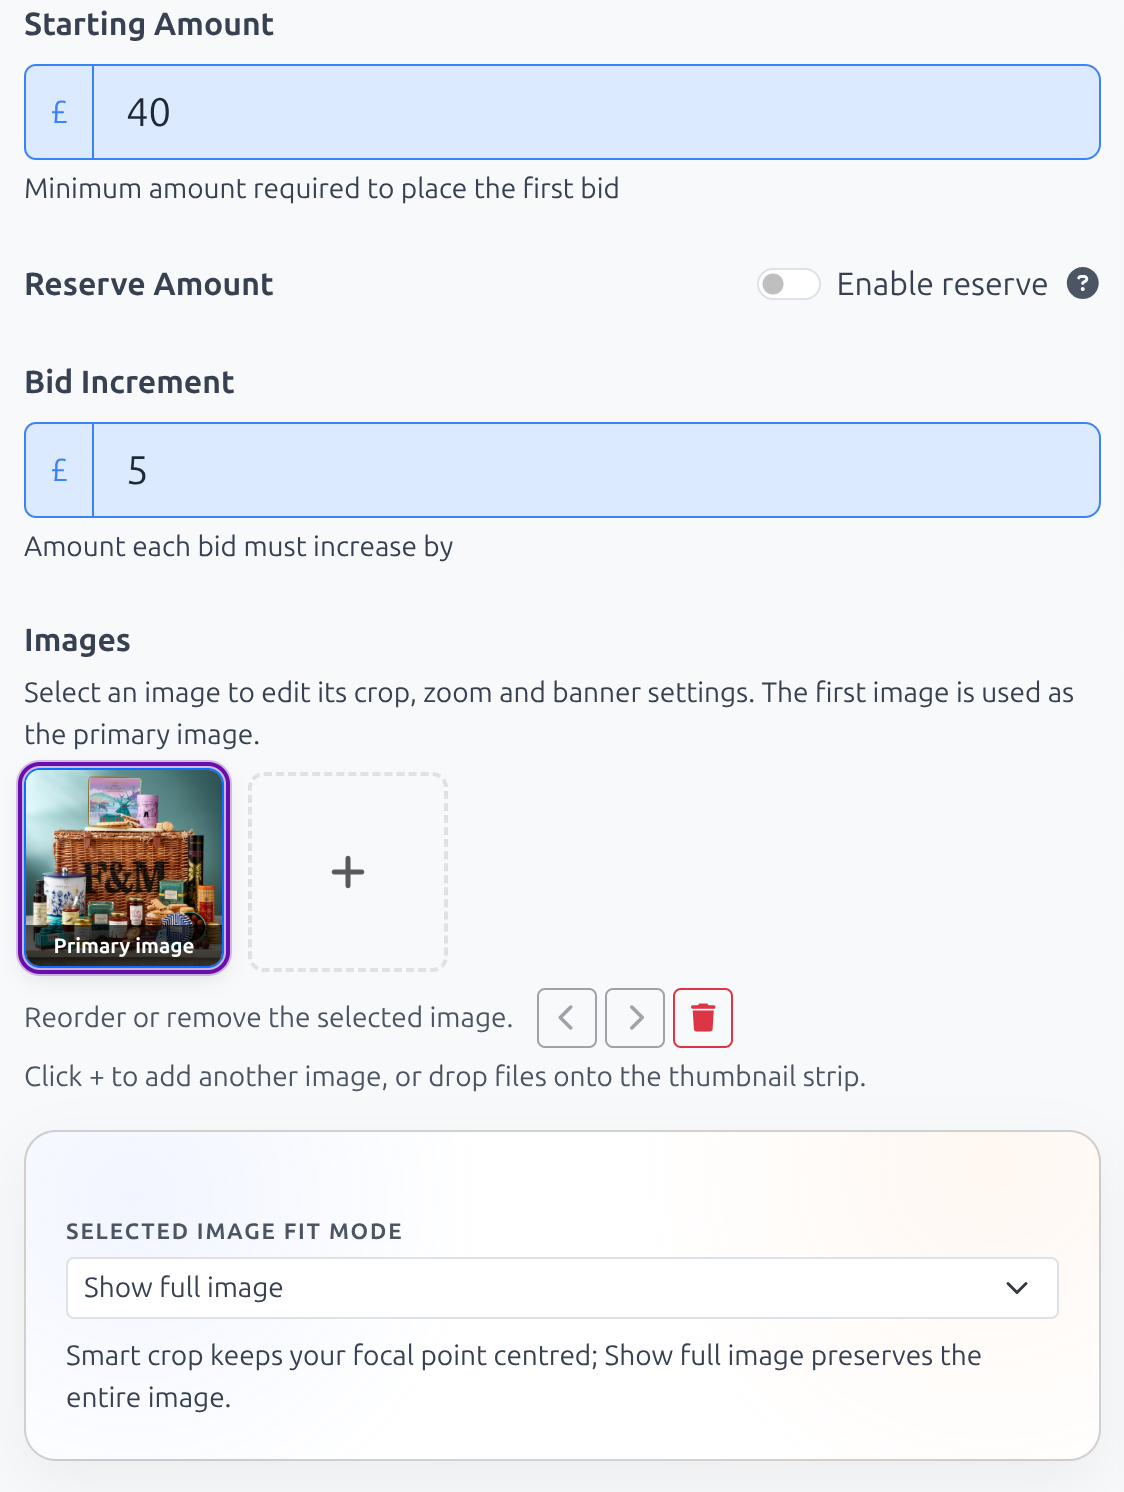
- Starting Amount: the minimum first bid.
- Bid Increment: the amount by which each new bid increases.
- Reserve Amount: an optional minimum that must be reached for the item to be sold. Turn on Enable reserve to use it.
The auction's currency applies to all three amounts. Read Reserve pricing before using a reserve. It explains the valid amounts and what bidders see.
Add and arrange images
Upload several JPG, PNG or GIF images up to 10 MB each. Make the first image the primary one shown in listings. Select an image to reorder, remove, crop, zoom or change its fit, and check the previews before saving.
Edit and order items
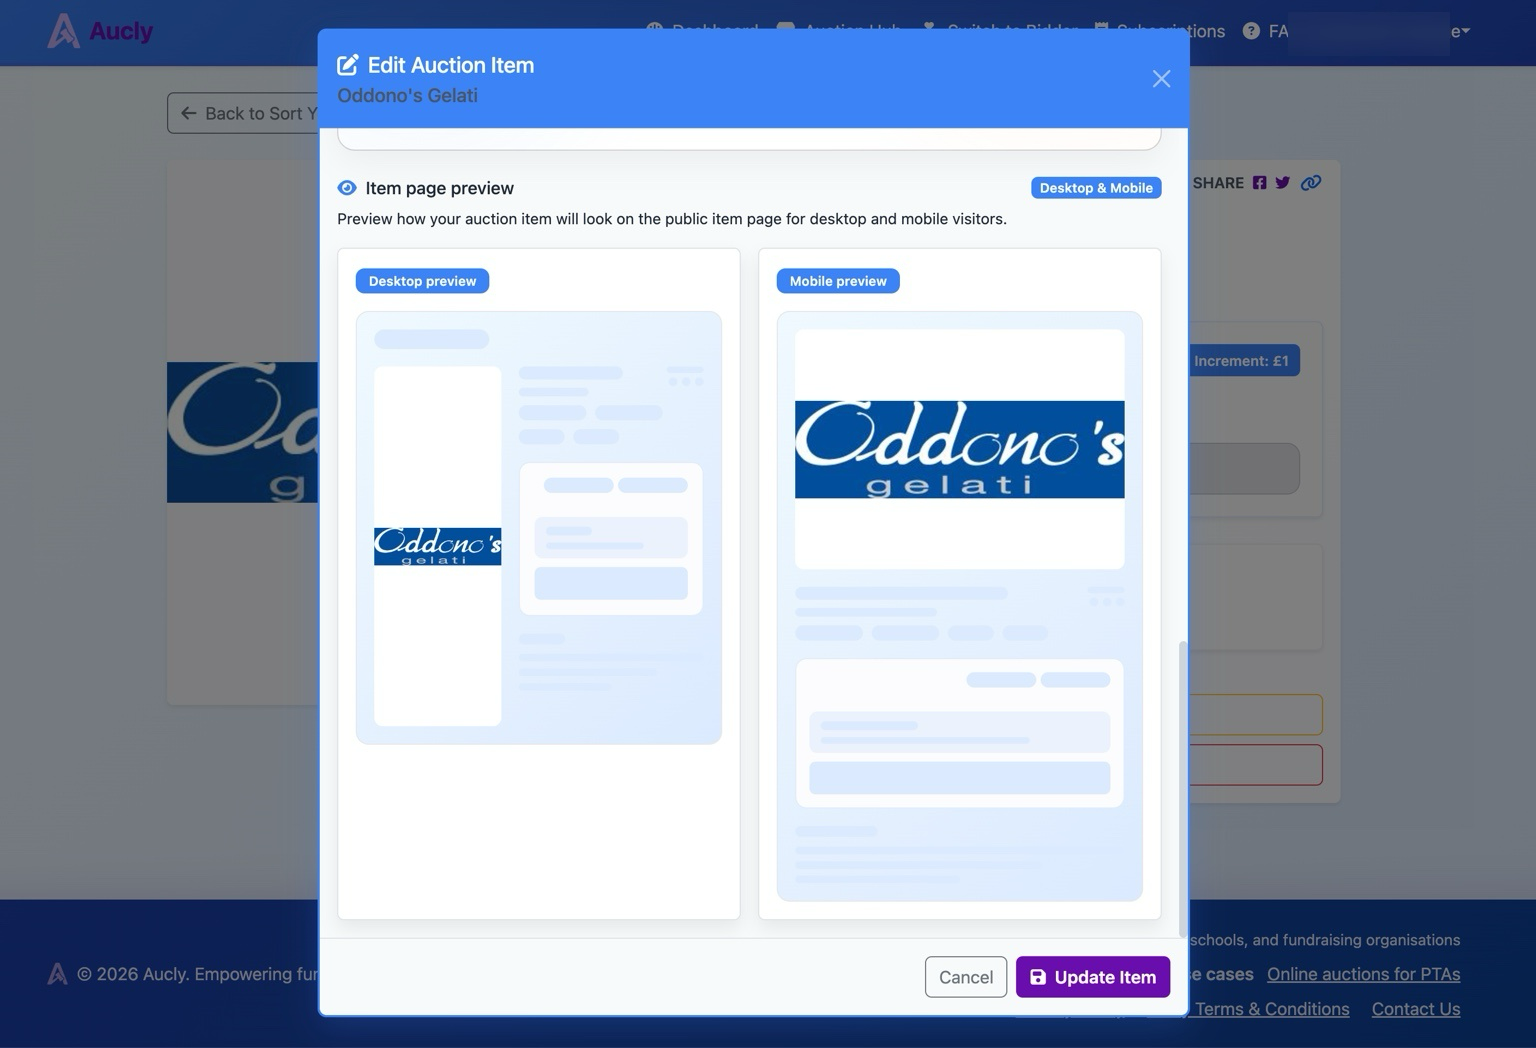
Open an item's actions and select Edit Item. Review the public preview and select Update Item when you are ready.
After an item receives its first bid, its bidding amounts cannot change and the form says Price fields are locked because this item has received bids. You can still correct its other bidder-facing details until the auction has ended or been archived.
Back on the auction page, use each item's drag handle to put the items in the order bidders should see. Sorting the list for your own view does not replace that saved display order.
Choose public recognition or private details
If a donor agrees to be recognised, you can show a public display name and optional website on the item page without publishing their contact or fulfilment details.
- Open the item's actions, select Edit Item, and choose the Prize admin tab.
- In Public acknowledgement, select Show a public donor acknowledgement. Enter the Public display name the donor wants bidders to see (up to 200 characters) and, if useful, a Donor website (up to 2,048 characters, beginning with
http://orhttps://). At least one of these fields must have a value; you can provide a name without a website or a website without a name. - Select Update Item. When both fields are filled in, the name links to the website. With a name only, it appears as plain text. With a website only, bidders see a link labelled “the donor”.
Only the opted-in public display name and website appear publicly. Internal notes, the private Donor name, donor contact details, Prize location, Fulfilment instructions and Private attachments remain organiser-only. You can change the public name or website by editing the item again. To remove the acknowledgement, clear the checkbox and save; the public name and website are removed from the item page.
The first image shows the saved organiser settings. The next shows the corresponding bidder-facing item page. The draft-status notice appears until the auction is scheduled; it does not change which donor details are public.
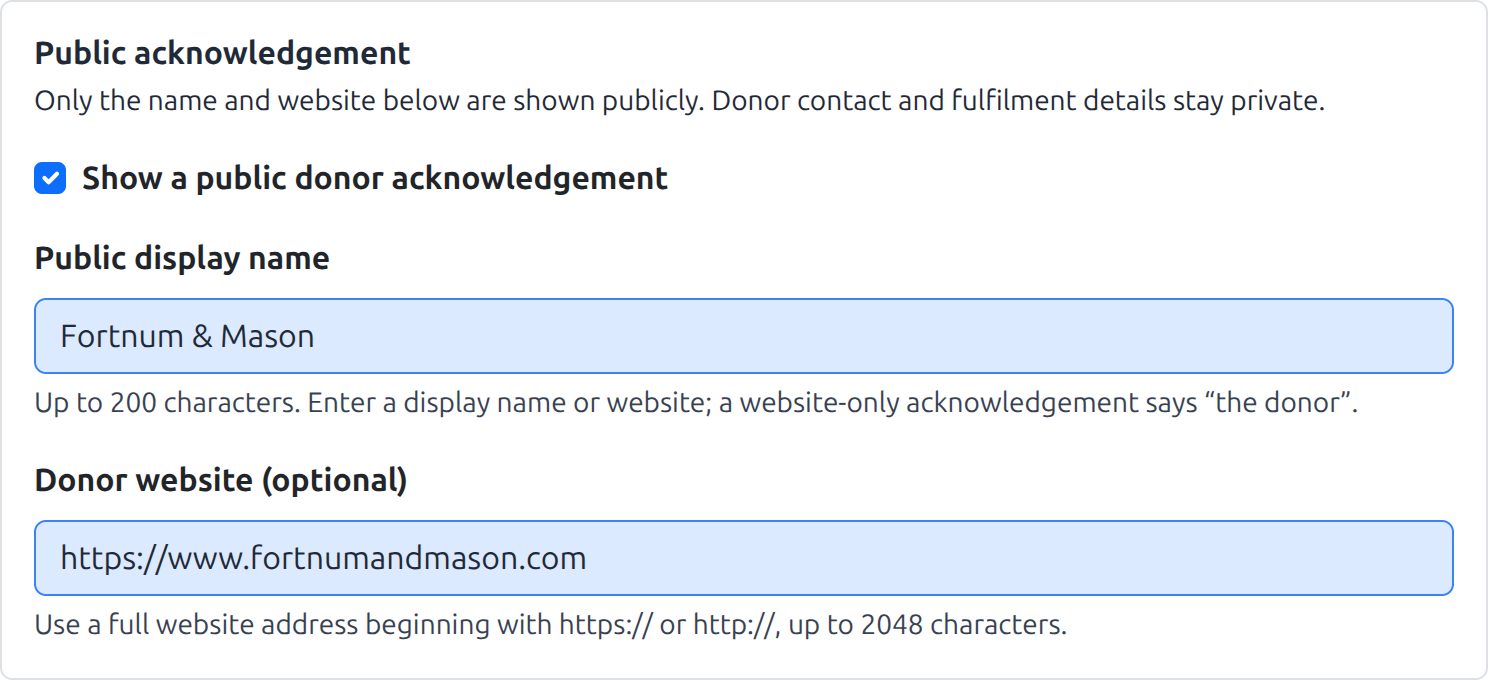
Organiser settings: public acknowledgement enabled for Fortnum & Mason; donor contact details remain private.
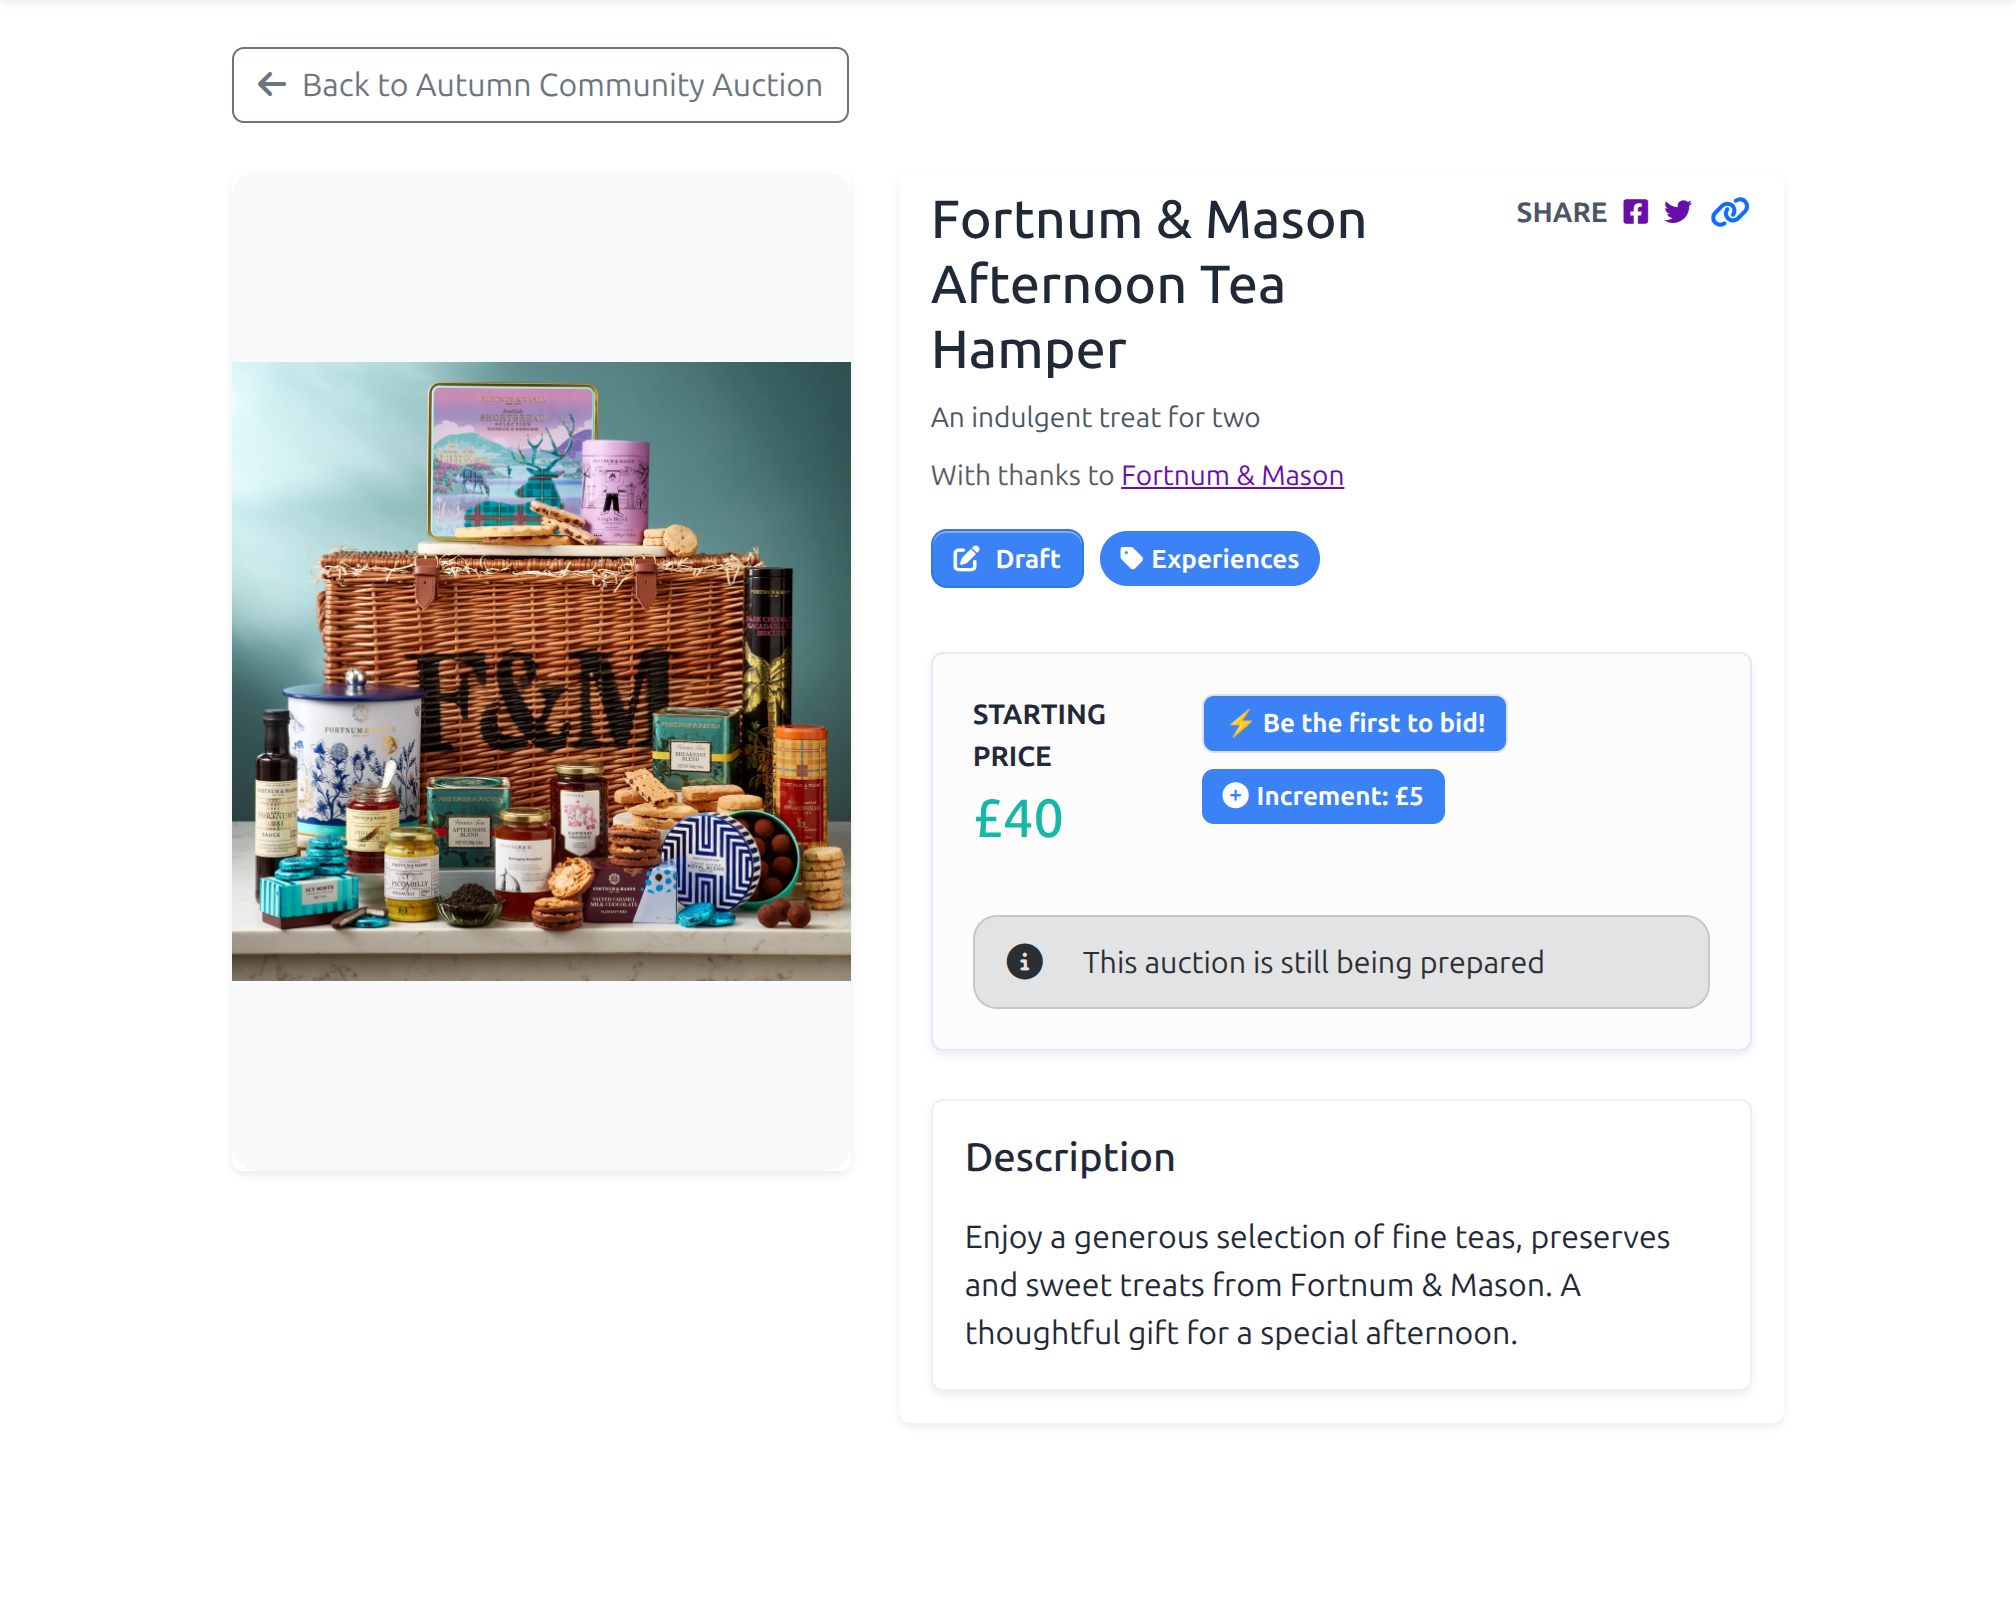
Bidder view: the public Fortnum & Mason acknowledgement appears with the hamper and its bidding details.
When you duplicate an item, its public acknowledgement is turned off and its name and website are cleared. Confirm permission again before adding an acknowledgement to the new item.
Use the Prize admin tab for Internal notes, Donor name, Donor contact name, Donor email, Donor phone, Prize location, Fulfilment instructions and Private attachments.
These private details are not shown on public auction or item pages, and Aucly does not send them automatically. When the auction has ended, Collect Payments lets you choose which fulfilment details and attachments to include in a winner email.
Before scheduling, correct any item that does not have a valid bidding sequence. See Reserve pricing for worked examples.